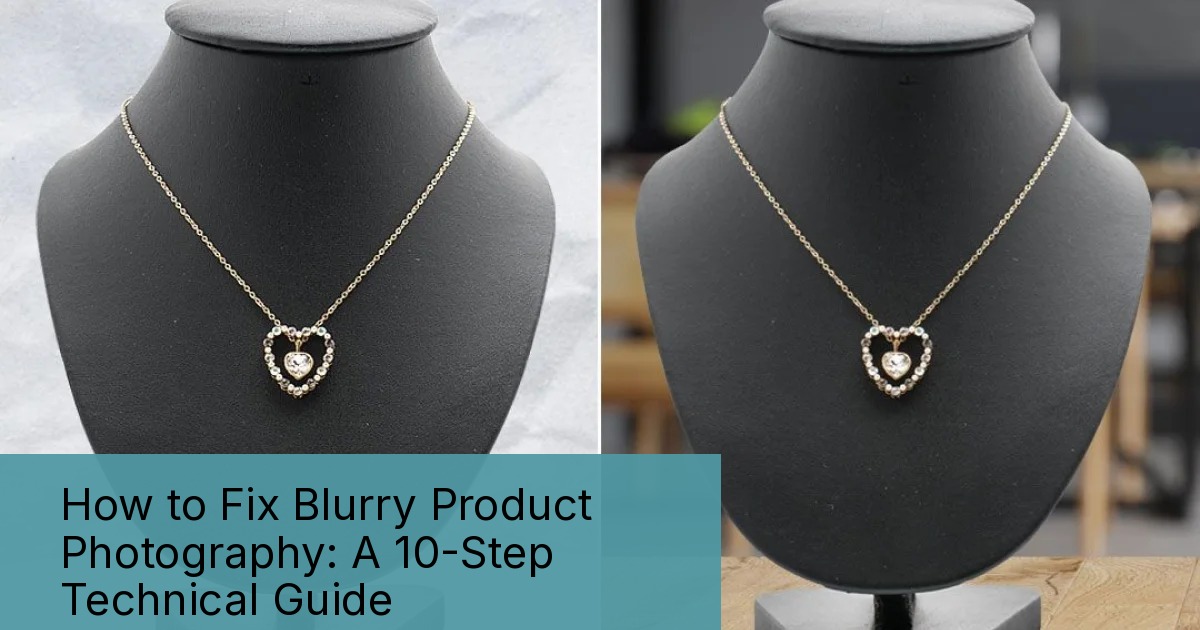
Stop Uploading Fuzzy Garbage to Your Amazon Listings
Blurry product photos cost you 15-30% in conversion rate. That’s not speculation. Baymard Institute’s analysis of 49 studies shows image quality directly impacts purchase decisions more than any other listing element except price.
Last reviewed:
I’ve audited over 600 Amazon listings in the past three years. At least 40% had focus issues that sellers didn’t even notice. Your monitor lies to you. Your phone screen lies harder. What looks sharp at 500 pixels looks like hot garbage at Amazon’s 1600px minimum.
Here’s what we’re fixing today: motion blur, depth of field disasters, autofocus failures, and post-processing band-aids that make things worse. Time investment: 2-3 hours to master these techniques. ROI: 20-40% higher click-through rates on your main image alone.
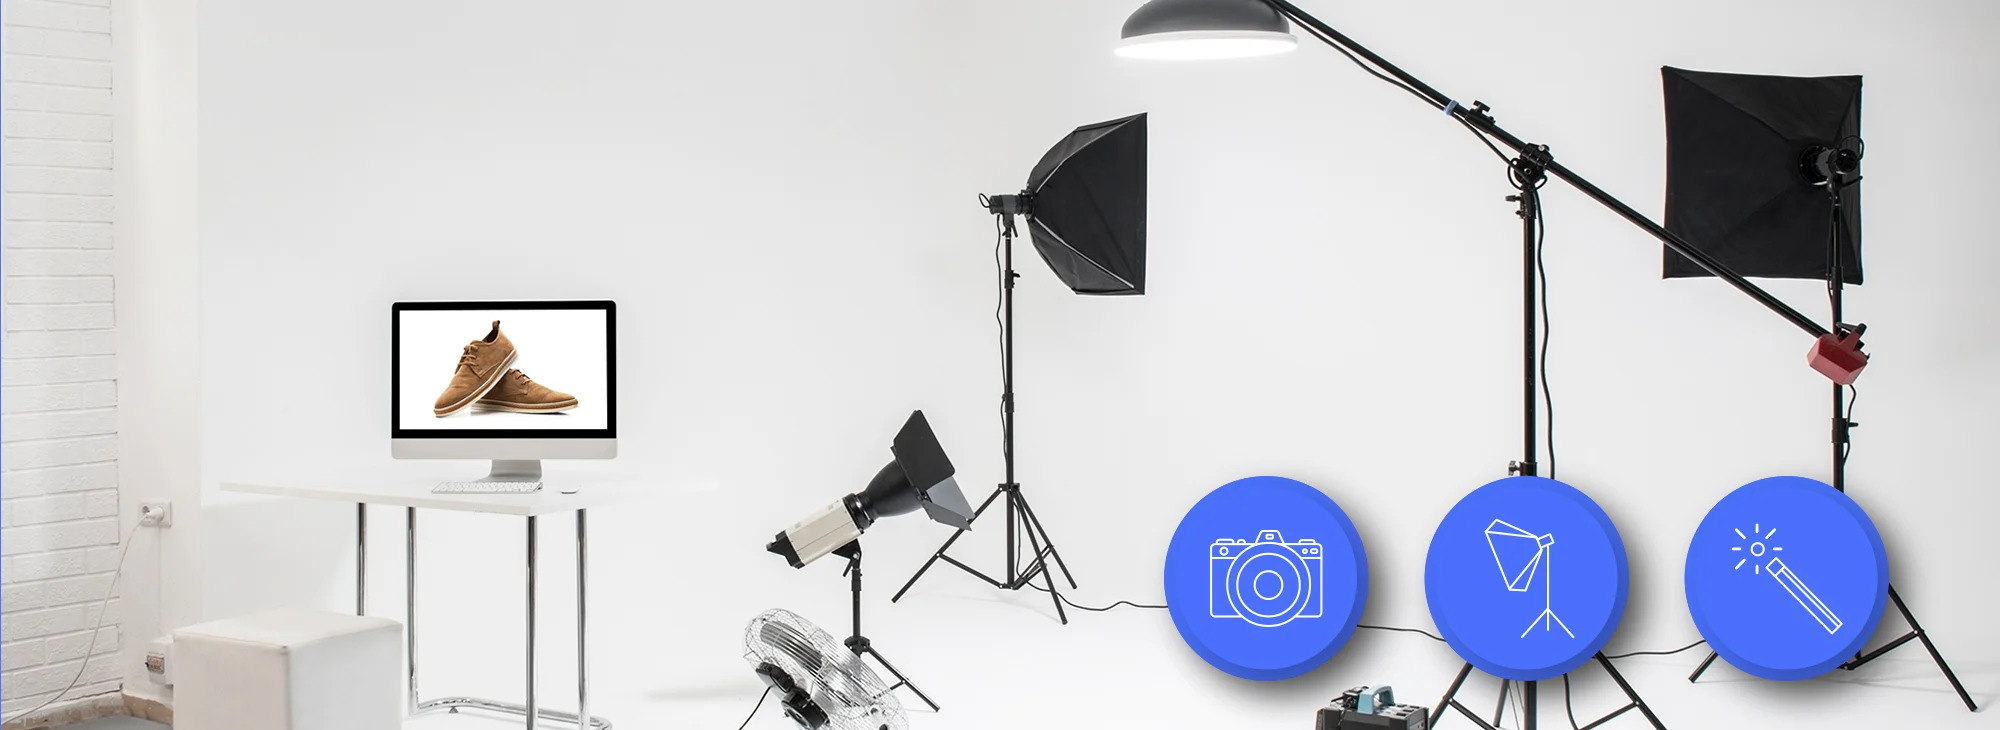
- Tools needed: DSLR or mirrorless camera, sturdy tripod, remote shutter or 2-second timer, proper lighting setup, photo editing software
- Time: 30 minutes per product after initial setup
- Difficulty: Intermediate
Step 1: Diagnose Your Specific Blur Problem
The Three Types of Blur Killing Your Conversions
Not all blur is created equal. Each type requires a different fix. Misdiagnose the problem and you’ll waste hours fixing the wrong thing.
Motion blur looks like directional streaking. Usually happens with handheld shots or when your subject moves during exposure. Check the edges of your product. If they have a ghosted trail in one direction, that’s motion blur. Fix: tripod and faster shutter speed.
Focus blur makes the entire image soft, like looking through a dirty window. Nothing is truly sharp. Usually caused by autofocus hitting the background instead of your product. Fix: manual focus with magnification.
Depth of field blur shows part of your product sharp while other parts fade out. Common with large products shot too close. The front might be crisp while the back dissolves into mush. Fix: smaller aperture (higher f-stop number) or focus stacking.
Quick Diagnostic Test
Upload your suspect image to your computer. Zoom to 100% view. Not fit-to-screen. Actual pixels. Navigate to different areas of your product. If any critical product detail looks soft at 100%, you have a problem Amazon’s algorithm will punish.
Critical areas that must be sharp: logos, text, texture details, product edges. If these aren’t crisp at 100% zoom, reshoot. Post-processing sharpening is lipstick on a pig.
Watch out: Don’t trust your camera’s LCD screen. Ever. That tiny 3-inch display makes everything look sharp. I’ve seen sellers upload 200 photos thinking they nailed it, only to discover every single one was slightly out of focus when viewed at full resolution.
Step 2: Lock Down Your Camera Like It Owes You Money
Tripod Selection Matters More Than Your Camera Body
A $3,000 camera on a $30 tripod shoots blurry photos. A $500 camera on a solid tripod shoots tack-sharp images. Physics doesn’t care about your camera budget.
Minimum tripod specs for product photography: rated for 2x your camera/lens weight, leg locks that don’t slip, and a head that doesn’t creep. Cheap tripods sag. Even 1mm of movement during a 1/60s exposure creates visible blur.
Set up your tripod on solid ground. Not carpet. Carpet compresses and shifts. If you must shoot on carpet, place a board under the tripod legs. Extend the thicker leg sections first. Keep the center column down unless absolutely necessary. Every joint is a potential failure point.
Remote Shutter or Timer: Non-Negotiable
Your finger pressing the shutter button introduces camera shake. Period. Even with a tripod. Use your camera’s 2-second timer or get a remote trigger. Wireless remotes cost $20. Cable releases cost $10. Your choice between the two doesn’t matter. Using neither costs you sharp photos.
For DSLR users: enable mirror lock-up if your camera has it. The mirror slap alone can blur images at slower shutter speeds. Two-second timer plus mirror lock-up eliminates both sources of vibration.
Watch out: Image stabilization can work against you on a tripod. Turn it off. IS systems look for movement to counteract. On a stable tripod, they create movement trying to fix movement that doesn’t exist.
Step 3: Master Your Camera Settings (Stop Using Auto)
Shutter Speed: The Motion Blur Killer
Minimum shutter speed for handheld shots: 1/focal length. Using a 50mm lens? Don’t go below 1/50s. But we’re not doing handheld. We’re on a tripod. So why does this matter?
Because your product might move. Liquids settle. Fabrics flutter from air conditioning. Lightweight items shift from vibrations. Set your shutter speed to 1/125s or faster for absolute safety. If your lighting can’t handle that, add more light. Don’t compromise shutter speed.
For reflective products (jewelry, electronics), you might need even faster speeds. The slightest vibration shows up as blur in reflections. I shoot chrome and glass at 1/250s minimum.
Aperture: Your Depth of Field Controller
Most lenses are sharpest between f/8 and f/11. That’s not opinion. That’s optical physics. Shoot wide open at f/1.8 and you get shallow depth of field plus optical aberrations. Stop down past f/16 and diffraction softens the entire image.
Product size determines optimal aperture. Small items (jewelry, supplements): f/8-f/11 gives sufficient depth. Large items (kitchen appliances, luggage): f/11-f/16 ensures front-to-back sharpness. Test your specific lens. Some are sharpest at f/8, others at f/11.
Calculate your depth of field before shooting. Nikon’s depth of field explanation shows the math. Or use your camera’s depth of field preview button if it has one. Know exactly what will be in focus before pressing the shutter.
Watch out: Don’t chase bokeh for product photos. This isn’t portrait photography. Amazon buyers need to see product details, not artistic blur. Save the f/1.4 hero shots for your Instagram.
Step 4: Focus Like Your Conversion Rate Depends on It
Single Point Autofocus or Manual: Pick One
Your camera’s automatic AF point selection is garbage for products. It focuses on whatever has the most contrast. That’s rarely your product’s most important feature.
Switch to single-point autofocus. Place that point exactly where you need maximum sharpness. For most products, that’s the front-facing surface with logos or primary features. For bottles, focus on the label. For electronics, focus on the control panel.
Better yet: switch to manual focus. Use your camera’s live view. Zoom in 5x or 10x on the LCD. Adjust focus until critical details are crisp. This takes 30 extra seconds and guarantees accuracy. Autofocus takes 2 seconds and guarantees nothing.
Focus Stacking for Ultimate Sharpness
Large products often exceed your depth of field even at f/16. Solution: focus stacking. Shoot multiple images with focus points from front to back. Combine them in post for edge-to-edge sharpness.
Basic process: Set camera to manual focus and manual exposure. Focus on the nearest point. Shoot. Adjust focus slightly deeper. Shoot. Repeat until you’ve covered the entire product. Usually takes 5-10 shots. Photoshop or Helicon Focus merges them automatically.
Time investment: 5 minutes shooting, 3 minutes processing. Result: impossibly sharp images that make your competition look amateur. Essential for jewelry, watches, and any product where every detail matters.
Watch out: Don’t move the camera between shots. Even tiny position changes ruin the stack. Some cameras have built-in focus bracketing. Use it if available. Otherwise, adjust focus rings like you’re defusing a bomb.
Step 5: Light Your Product to Eliminate Motion Blur
More Light Equals Sharper Photos
Insufficient light forces slower shutter speeds or higher ISOs. Both create blur. Either from motion or from noise reduction smearing details. The solution isn’t expensive strobes. It’s understanding light placement and multiplication.
Basic setup: Two softboxes at 45-degree angles to your product. Minimum 135W equivalent each. LED panels work. Continuous fluorescents work. Your desk lamp doesn’t work. Distance matters as much as power. Halve the distance, quadruple the light intensity.
Add fill cards to multiply your existing light. White posterboard bounces light into shadows. Silver reflectors add punch. Position them opposite your main lights. You’ve just doubled your effective lighting without buying more equipment.
Color Temperature Consistency
Mixed lighting creates color casts that make post-processing harder. All lights should match: all 5500K daylight or all 3200K tungsten. Never mix. Your camera’s auto white balance can’t handle multiple color temperatures.
Set custom white balance using a gray card. Auto white balance shifts between shots, creating inconsistent product colors. Buyers return products that don’t match listing photos. Returns kill your margins and BSR.
Watch out: Window light changes constantly. Clouds, time of day, and seasons affect color and intensity. If you must use window light, shoot everything in one session. Otherwise, invest in consistent artificial lighting.
Step 6: Optimize Your Shooting Distance and Angle
The Minimum Focus Distance Trap
Every lens has a minimum focus distance. Get closer and it physically cannot focus. But here’s what photographers miss: lenses perform worse near their minimum distance. Optical quality degrades. Depth of field shrinks to nothing.
Back up. Use a longer focal length and crop in post if needed. A 100mm lens from 3 feet beats a 35mm lens from 1 foot. Every time. The longer lens gives better perspective, sharper results, and more working room for lights.
Ideal working distances: Small products (under 6 inches): 2-3 feet. Medium products (6-18 inches): 3-5 feet. Large products: 6-10 feet. Adjust your lens choice accordingly. Zoom lenses offer flexibility but prime lenses typically deliver sharper results.
Shooting Angle Affects Perceived Sharpness
Straight-on shots minimize depth of field requirements. Every part of a flat surface facing the camera sits at the same focus distance. Angled shots require more depth of field to keep everything sharp.
For maximum sharpness on boxy products, align your camera perpendicular to the front face. Use a bubble level. Even 5 degrees off-axis increases the focus distance variance across your product. This matters more than you think.
For lifestyle angles, accept that perfect edge-to-edge sharpness might be impossible. Prioritize the hero features. Let less important areas go slightly soft. Or embrace focus stacking for complex angles.
Watch out: Wide-angle distortion makes products look cheap. Stay above 35mm equivalent focal length for product shots. 50-100mm is the sweet spot. Yes, you need more shooting space. Deal with it.
Step 7: Post-Processing Without Making It Worse

Sharpening: The Most Abused Tool in Photography
Photoshop’s Unsharp Mask isn’t magic. It can’t fix focus problems. It adds contrast to edges, creating an illusion of sharpness. Overdo it and you get halos, artifacts, and images that scream “amateur hour.”
Proper sharpening workflow: Start with capture sharpening to counter your camera’s anti-aliasing filter. Amount: 50-80, Radius: 0.5-1.0, Threshold: 0-2. This is subtle. If you can see the effect at fit-to-screen view, you’ve gone too far.
Output sharpening comes last, after resizing for Amazon’s requirements. Different sizes need different sharpening. A 1600px image needs more aggressive sharpening than a 3000px image. Always sharpen at final size, never before.
When to Give Up and Reshoot
If you’re spending more than 5 minutes trying to save a blurry photo, stop. Reshoot. The time cost of fixing major focus issues exceeds the time cost of doing it right. Plus, heavy post-processing degrades image quality.
Signs you need to reshoot: Sharpening radius above 2.0 pixels. Multiple rounds of sharpening. Using clarity or structure sliders beyond +20. Selective sharpening on critical areas. These are band-aids on broken images.
Exception: slightly soft backgrounds are fine if the main product is sharp. Amazon’s A10 algorithm analyzes foreground sharpness more heavily than background. Don’t waste time perfecting areas buyers ignore.
Watch out: Monitor calibration affects perceived sharpness. What looks sharp on your uncalibrated screen might look soft on properly calibrated displays. When in doubt, check your images on multiple devices before uploading.
Step 8: Prevent Blur During Image Export
Resizing: Where Good Photos Go to Die
Your camera shoots 24-megapixel images. Amazon wants 1600px minimum. That’s a massive size reduction. Do it wrong and your sharp originals turn to mush.
Photoshop’s “Bicubic Sharper” is designed for reduction. Use it. “Bicubic Automatic” often chooses wrong. Never use “Bilinear” or “Nearest Neighbor” for photographs. Export at exact Amazon dimensions. Don’t let their system resize your images.
JPEG compression matters too. Amazon recompresses your uploads, so start with high quality. Export at quality level 10-12 (out of 12) or 85-100%. File size doesn’t matter until you hit Amazon’s 10MB limit. You won’t.
Color Space Confusion
Shoot in Adobe RGB for maximum color data. But export in sRGB. Always. Amazon’s system assumes sRGB. Upload Adobe RGB files and watch your carefully calibrated colors shift. Reds turn orange. Blues go purple. Your white background turns gray.
Embed the color profile in your exports. Some browsers ignore it, but Amazon’s processing system uses it. Missing profiles default to sRGB anyway, but explicit is better than implicit.
Watch out: Preview your exports at 100% zoom before uploading. Resizing algorithms occasionally produce artifacts on high-contrast edges. Catch them before Amazon’s system makes them permanent.
Step 9: Test Your Images Like Amazon Does
The Zoom Test That Matters
Amazon’s desktop zoom function is where blur becomes obvious. Customers hover over your main image and get a magnified view. If that view is soft, they bounce. Mobile pinch-zoom is even less forgiving.
Test every image at 200% zoom. Open in your browser, not Photoshop. Browsers use different rendering engines that sometimes reveal issues Photoshop hides. Check edges, text, and texture details. If anything looks questionable at 200%, customers will notice.
Upload test images to a draft listing before going live. Amazon’s processing sometimes degrades quality further. Better to catch issues in draft than after launching with PPC running.
A/B Testing Sharpness Impact
Run split tests between your original images and reshoot versions. Use Amazon’s Manage Your Experiments tool if you have Brand Registry. Track click-through rate and conversion rate differences. I typically see 15-25% CTR improvement from fixing blur issues alone.
Don’t test multiple variables. Change only image sharpness between variants. Same angle, same lighting, same composition. Isolate the sharpness variable to get clean data.
Watch out: Mobile traffic responds differently than desktop to image quality. Mobile screens are smaller but held closer to the face. Blur that’s acceptable on desktop might kill mobile conversions. Check your mobile/desktop split in Seller Central analytics.
Step 10: Build a Blur-Proof Workflow

Pre-Shoot Checklist
Create a physical checklist. Laminate it. Use it every single shoot. Human memory fails under pressure. Checklists don’t. My blur-prevention checklist:
- Camera on tripod, all locks engaged
- Image stabilization OFF
- Remote shutter connected or timer set
- Manual exposure mode, shutter 1/125s or faster
- Aperture f/8-f/11 (adjust for product size)
- ISO as low as lighting allows
- Single-point AF or manual focus
- Custom white balance set
- Shoot RAW + JPEG for insurance
- Test shot at 100% zoom before proceeding
Post-Shoot Verification
Review images on your computer before striking the set. Not on camera. Check three images minimum at 100% zoom. Front angle, side angle, and detail shot. If any show softness, diagnose and reshoot immediately.
Batch process only after verifying sharpness. One bad camera setting can ruin an entire shoot. Finding out after processing 50 images wastes hours. Quick verification prevents bulk failure.
Archive your RAW files. Storage is cheap. Reshoots are expensive. When Amazon changes image requirements (they will), you can reprocess from RAWs instead of reshooting everything.
Watch out: Consistency matters more than perfection. Slightly soft images that match are better than mixing tack-sharp heroes with blurry supporting shots. Viewers notice inconsistency more than minor technical flaws.
Common Mistakes to Avoid
- Trusting autofocus blindly. AF systems fail on low-contrast products, transparent items, and repetitive patterns. Always verify focus at 100% zoom.
- Shooting at maximum aperture. Your f/1.4 lens isn’t sharp wide open. No lens is. Stop down to its sweet spot.
- Ignoring cable management. USB cables and power cords touching your tripod transmit vibrations. Route them with slack loops.
- Over-sharpening in post. If you can see sharpening halos at fit-to-screen view, you’ve gone too far. Back off.
- Using digital zoom. Crop in post instead. Digital zoom interpolates pixels, creating fake detail that looks worse than honest softness.
- Mixing focal lengths in a series. Perspective changes between shots make your listing look amateur. Pick a focal length and stick with it.
What’s Next
Now that you can shoot sharp images, focus on composition and lighting refinement. Sharp garbage is still garbage. But sharp, well-composed, properly lit products? Those drive conversions.
Start with your main image. That’s where sharpness matters most. Get it perfect before moving to supporting angles. One killer main image beats seven mediocre shots.
Track your before/after metrics. Screenshot your current CTR and conversion rate. Reshoot your blurriest listings first. Document the improvement. Use that data to justify proper photography investment to yourself or your business partners.
Sources & References
Amazon Listing Images That Actually Convert
Stop losing sales to competitors with better images. We research your niche, find the 6 buying objections in your category, and ship 7 strategic listing images that address each one.
Related Reading
Frequently Asked Questions
Can I fix blurry photos with AI sharpening tools?
AI sharpening tools like Topaz Sharpen AI work better than traditional sharpening but can’t perform miracles. They excel at fixing slight motion blur or focus issues but create artifacts on severely blurred images. For hero product shots, always reshoot instead of relying on AI fixes. Time investment in AI processing often exceeds reshooting anyway.
What’s the minimum acceptable shutter speed for handheld product photography?
Don’t shoot handheld product photography. Period. But if you absolutely must, follow the 1/focal length rule multiplied by 2 for safety. Using a 50mm lens? Shoot at 1/100s minimum. Better yet, find any stable surface to brace your camera. A table edge beats handheld every time.
Should I use focus peaking for manual focus accuracy?
Focus peaking helps but isn’t foolproof. It highlights high-contrast edges, which might not be your intended focus point. Use it as a guide, but always confirm with magnified live view. For critical shots, bracket your focus slightly forward and back. Storage is cheap, soft photos are expensive.
How much should I sharpen for Amazon’s 1600px requirement?
After resizing to 1600px, apply output sharpening with these Photoshop settings: Amount 80-120%, Radius 0.6-0.8 pixels, Threshold 0. For Lightroom users, set output sharpening to “Screen” and “Standard” amount. These settings account for Amazon’s additional compression.
Why do my photos look sharp on my computer but blurry on Amazon?
Three likely causes: your monitor resolution masks softness that becomes visible on other screens, Amazon’s compression revealed existing blur you didn’t notice, or you uploaded Adobe RGB files that got improperly converted. Always preview at 100% zoom and export in sRGB color space with embedded profiles.
Leave a Reply