Stop Burning Money on Amateur Product Photos
Your product photos are costing you thousands in lost sales. I’ve audited over 800 Amazon listings in the past three years. Nine out of ten sellers are shooting themselves in the foot with garbage images that tank their conversion rates.
Last reviewed:
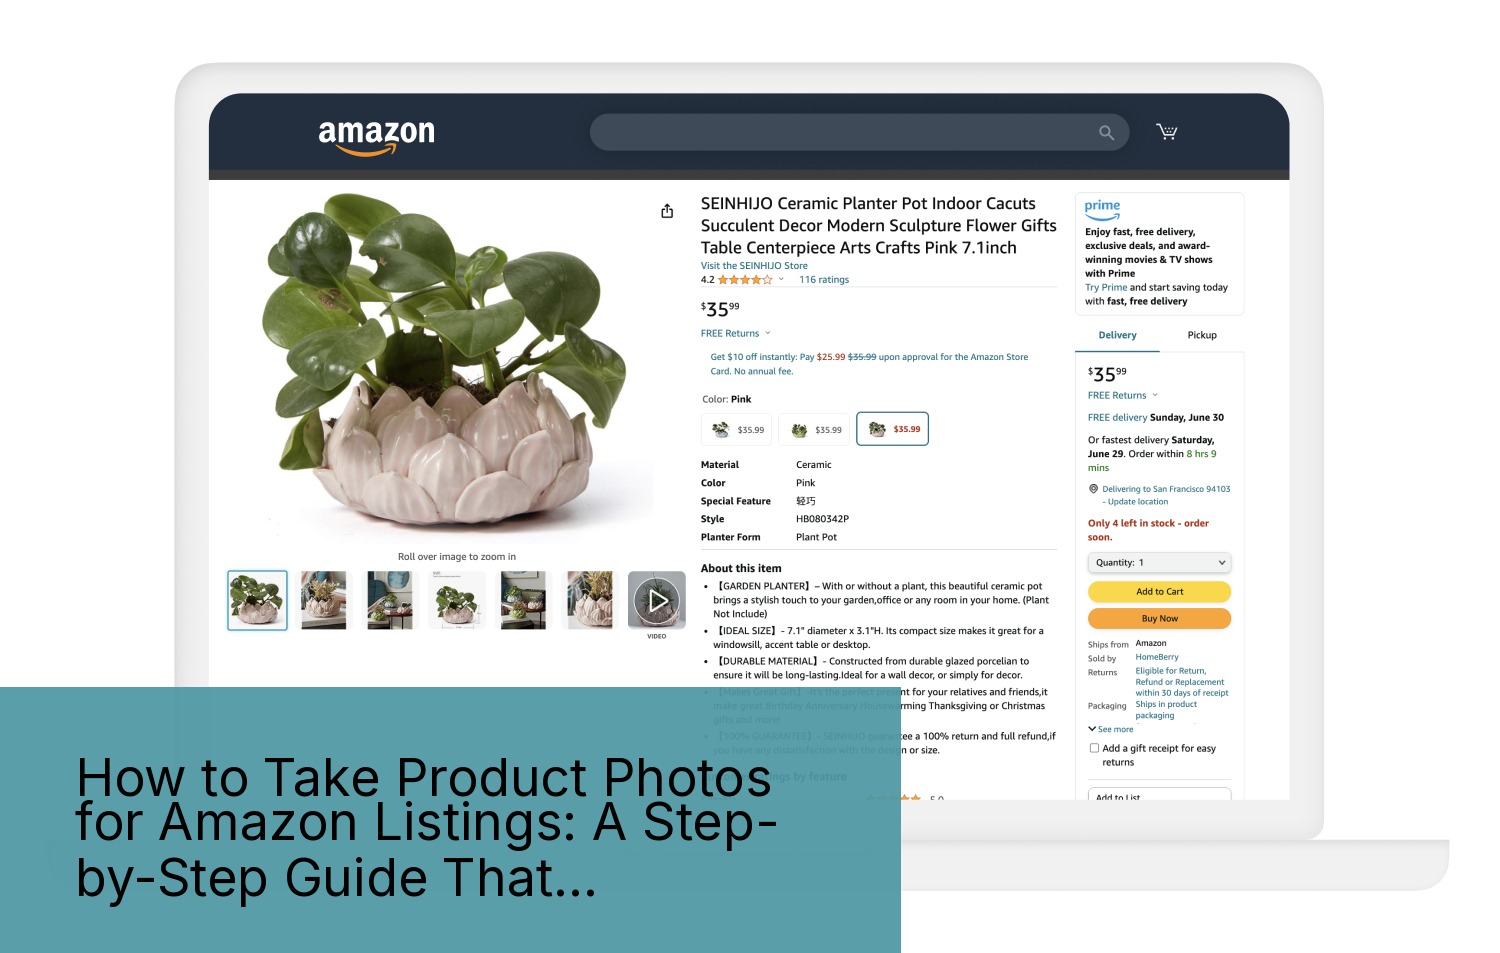
Here’s the brutal truth: Amazon shoppers make buying decisions in under three seconds. They’re not reading your bullet points. They’re not checking your A+ Content. They’re scanning your main image and deciding whether to click or keep scrolling.
Bad photos don’t just hurt your conversion rate. They destroy your entire listing economics. When your main image CTR drops from 2% to 1%, your PPC costs double. Your organic ranking tanks. Your competitors eat your lunch.
This guide shows you exactly how to take product photos for Amazon listings that actually convert browsers into buyers. No theory. No fluff. Just the proven process I’ve used to help sellers increase their conversion rates by an average of 35%.
What You’ll Learn in This Guide
- Tools needed: Camera (DSLR or smartphone), tripod, white backdrop, lighting kit, photo editing software
- Time: 4-6 hours for a full 7-image set
- Difficulty: Intermediate
We’re covering the entire process from equipment setup to final image delivery. You’ll learn the exact specifications Amazon requires, the lighting setups that work, and the post-processing steps that separate professional images from amateur hour.
Who This Guide Is For
This guide is for FBA sellers who understand that product photography directly impacts their bottom line. If you’re currently using supplier photos or smartphone snapshots on a kitchen table, you’re leaving money on the table.
The techniques here work whether you’re selling supplements, kitchen gadgets, beauty products, or electronics. The principles stay the same. The execution varies by category, and I’ll show you exactly how.
The Real Cost of DIY Photography
Most sellers think they’re saving money by shooting their own product photos. Wrong. Let me show you the math.
A professional product photography setup runs about $2,000 minimum. Add another 20-30 hours to learn proper technique. That’s your upfront investment.
Now calculate the opportunity cost. Every day your listing runs with subpar images costs you sales. A listing doing $10,000/month with a 10% conversion rate loses $3,000/month if bad images drop conversion to 7%. That’s $36,000/year.
Professional photography pays for itself in weeks, not months. But if you’re determined to shoot your own images, at least do it right.
Step 1: Understand Amazon’s Image Requirements (Or Get Suppressed)
Amazon has specific image requirements that they enforce with zero mercy. Violate them and your listing gets suppressed. No warnings. No second chances.
I’ve seen sellers lose $50,000 in revenue because their main image had a 15% shadow instead of pure white background. Amazon’s bots don’t care about your excuses.
Technical Specifications You Can’t Ignore
Here are the non-negotiable specs for Amazon product images:
- Minimum dimensions: 1000 x 1000 pixels (enables zoom function)
- Recommended dimensions: 2000 x 2000 pixels or larger
- File format: JPEG, PNG, GIF, or TIFF
- Color mode: RGB (not CMYK)
- File names: No spaces or special characters
- Maximum file size: 10MB per image
These are the bare minimums. But hitting the minimum specs doesn’t mean your images will convert. Amazon’s official image requirements tell you what’s allowed. They don’t tell you what actually works.
The sweet spot for image size is 2500 x 2500 pixels. This gives shoppers maximum zoom capability on both desktop and mobile. Anything smaller and you’re handicapping your conversion potential.
Main Image Rules That Matter
Your main image has the strictest requirements because it appears in search results. Screw this up and nobody sees your product.
Main image must-haves:
- Pure white background (RGB 255, 255, 255)
- Product fills 85% of the image frame
- No text, logos, or graphics
- No props or accessories not included in purchase
- Professional quality (not blurry, pixelated, or poorly lit)
- Accurate color representation
The 85% rule trips up most sellers. Your product needs to fill the frame without being cut off. Too small and it looks insignificant in search results. Too large and Amazon’s bots flag it.
Secondary Image Strategy
Your secondary images (slots 2-7) have more flexibility. you sell the benefits, show scale, and address objections.
Use these slots strategically:
- Slot 2: Lifestyle image showing product in use
- Slot 3: Feature callouts with text overlay
- Slot 4: Size/scale comparison
- Slot 5: What’s included in the box
- Slot 6: Close-up detail shots
- Slot 7: Comparison chart or guarantee badge
Every image needs a job. Random product angles waste valuable real estate. Plan your image sequence like a sales presentation.
Step 2: Set Up Your Photography Equipment (Without Breaking the Bank)
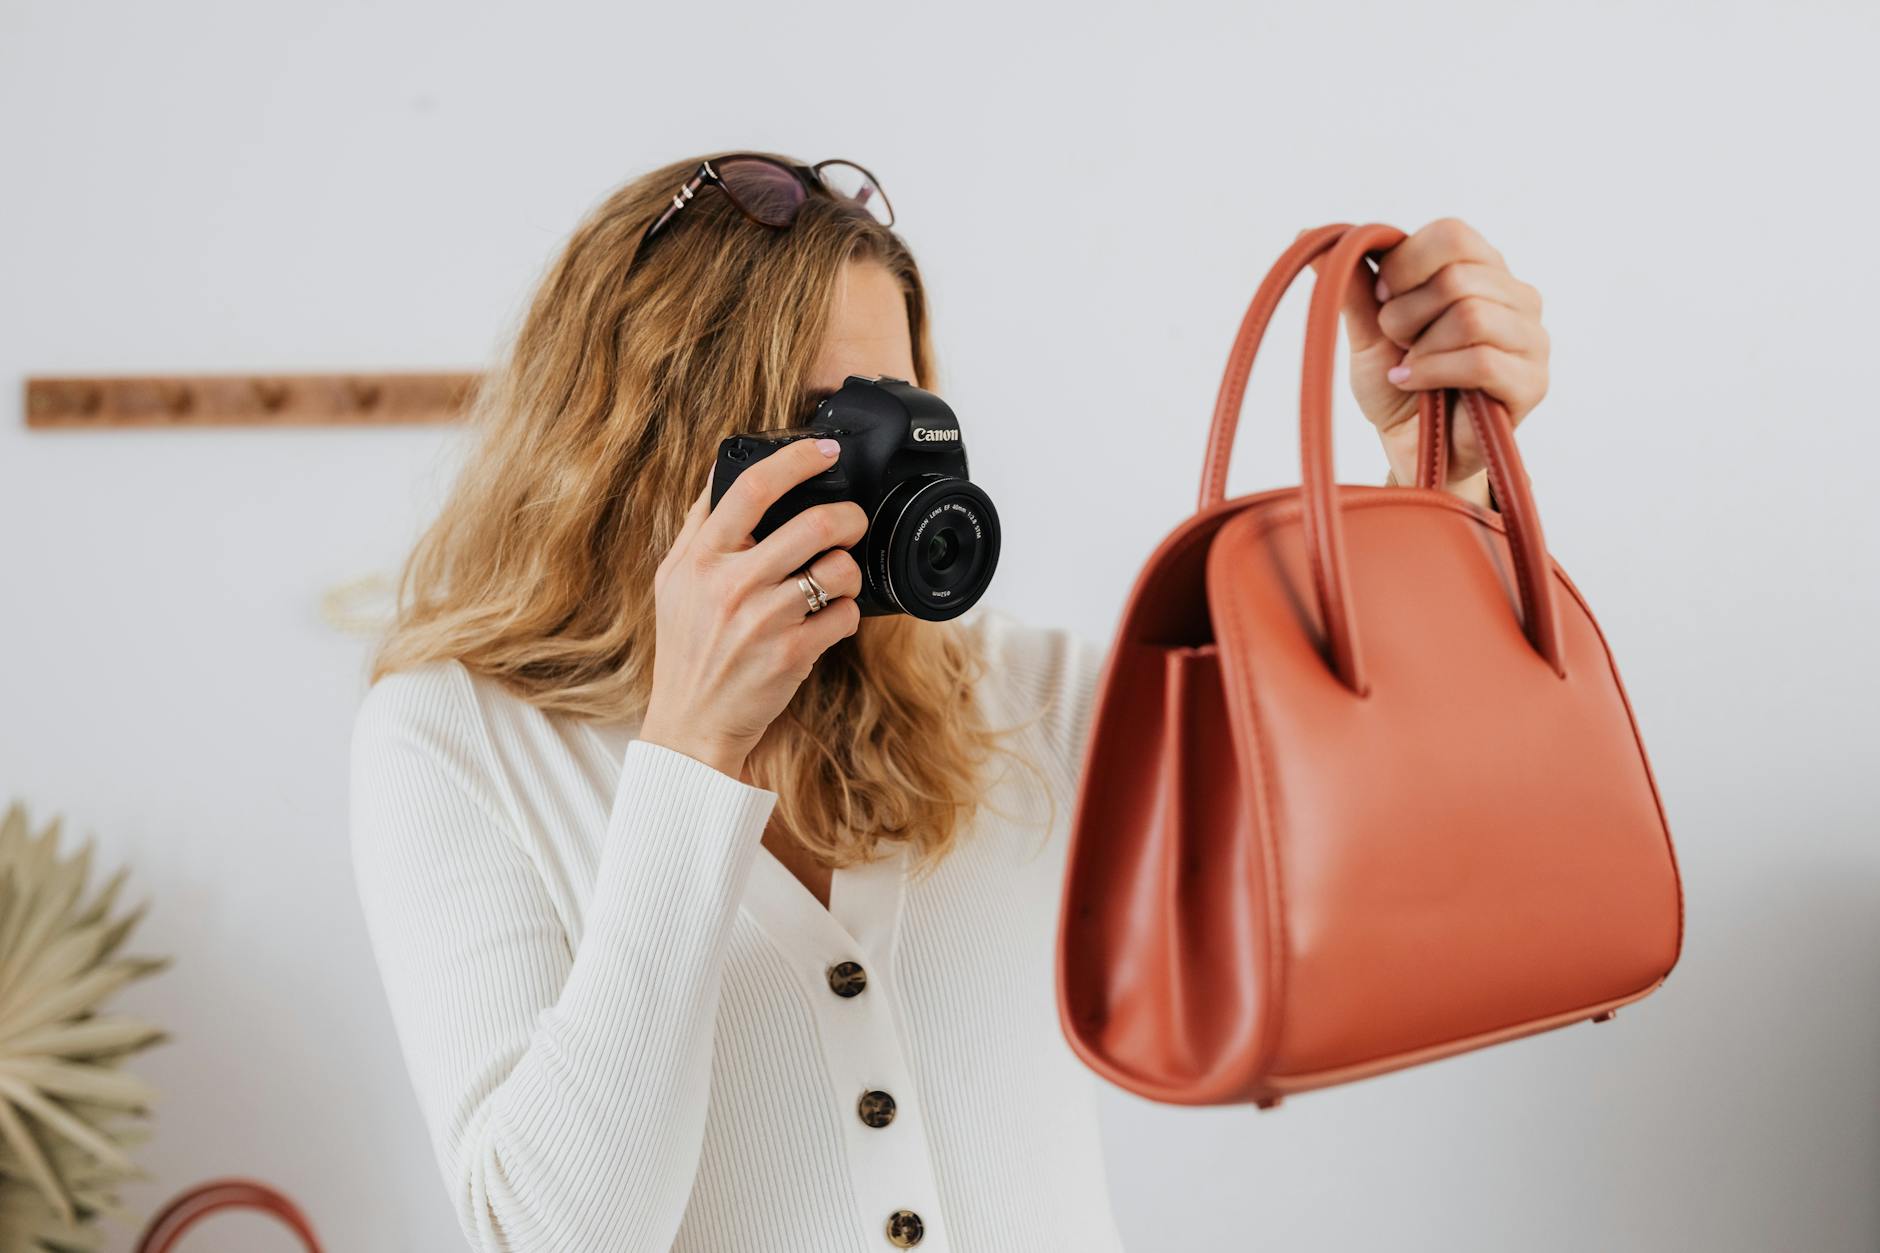
You don’t need $10,000 in equipment to shoot professional Amazon product photos. You need the right equipment used correctly.
I’ve shot images that generated six-figure revenue using a $500 camera and basic lighting. The difference between amateur and professional isn’t the gear. It’s knowing how to use it.
Camera Selection That Makes Sense
Any modern DSLR or mirrorless camera works for product photography. Hell, the iPhone 13 Pro or newer can produce Amazon-ready images if you know what you’re doing.
Recommended cameras for different budgets:
- Budget ($500-800): Canon EOS Rebel T7, Nikon D3500
- Mid-range ($800-1500): Canon EOS 90D, Sony a6400
- Professional ($1500+): Canon EOS R6, Sony a7 IV
- Smartphone option: iPhone 13 Pro or newer, Samsung Galaxy S22 Ultra
The camera body matters less than the lens. A 50mm or 85mm prime lens produces sharper images than any kit zoom lens. Invest in good glass before upgrading your camera body.
Lighting Setup That Actually Works
Lighting makes or breaks product photography. Period. You can’t fix bad lighting in post-production.
Here’s the basic three-light setup that works for 90% of products:
- Key light: Main light source at 45-degree angle to product
- Fill light: Secondary light opposite key light to reduce shadows
- Background light: Illuminates white backdrop for clean separation
You don’t need expensive strobe lights. Continuous LED panels work fine for product photography. A basic 3-light kit runs $200-300 on Amazon.
Light placement matters more than light power. Start with your key light 3-4 feet from the product. Move it closer for harder shadows, further for softer light. The fill light should be half the power of your key light.
Essential Accessories You Can’t Skip
These accessories separate professional results from amateur hour:
- Sturdy tripod: Eliminate camera shake, maintain consistent framing
- White sweep backdrop: Seamless paper or vinyl, minimum 5 feet wide
- Light stands: Position lights precisely and consistently
- Softboxes or umbrellas: Diffuse harsh light for even illumination
- Reflectors: Bounce light to fill shadows naturally
- Remote shutter release: Prevent camera shake when triggering
- Color checker card: Ensure accurate color reproduction
Skip any of these and your images suffer. A $50 tripod that wobbles ruins more shots than a cheap camera ever will.
Step 3: Master the Shooting Process (Where Most Sellers Fail)
Setting up equipment is easy. Shooting images that convert is where most sellers crash and burn.
I’ve watched sellers spend hours getting one mediocre shot because they don’t understand the fundamentals. Follow this process and you’ll nail it in minutes, not hours.
Camera Settings for Sharp, Clean Images
Forget auto mode. It’s garbage for product photography. Here are the manual settings that work:
- Aperture: f/8 to f/11 for maximum sharpness
- Shutter speed: 1/125 or faster (use tripod for slower)
- ISO: 100-400 for minimal noise
- White balance: Manual set to match your lights (usually 5600K for LED)
- Focus mode: Single point AF on the most important product detail
- File format: RAW + JPEG for maximum editing flexibility
These settings ensure sharp images with accurate colors. Aperture controls depth of field. At f/8, your entire product stays in focus. Go wider (f/2.8) and parts blur out. Go narrower (f/16) and you introduce diffraction softness.
Lighting Techniques That Sell Products
Good lighting shows product details without harsh shadows or blown highlights. Here’s how to nail it every time:
For reflective products (electronics, jewelry):
- Use larger softboxes to create broad, even reflections
- Position lights at shallow angles to minimize glare
- Add black cards to control reflections precisely
- Shoot through a light tent for ultimate control
For textured products (clothing, leather goods):
- Use raking light (low angle) to emphasize texture
- Add a rim light to separate product from background
- Use harder light (smaller softbox) for more dramatic shadows
For transparent products (bottles, glassware):
- Backlight through the product for glow effect
- Use black or colored backgrounds for contrast
- Add strip lights on sides to define edges
The key is starting with basic three-point lighting, then modifying based on your product’s properties.
Composition Rules That Increase Click-Through
How you frame your product directly impacts CTR in search results. Get this wrong and shoppers scroll right past.
Composition principles that work:
- Fill the frame: Product should occupy 85% of image area
- Straight angles: No tilted horizons or skewed perspectives
- Eye level shooting: Match how customers view products in real life
- Consistent positioning: Same angle across product variations
- Strategic shadows: Subtle shadows add dimension without violating white background rule
Test your main image composition by viewing it at thumbnail size. Can you immediately identify the product? Are key features visible? If not, reshoot.
Watch out: Over-cropping is the number one composition mistake. Leave breathing room around your product. Amazon’s image algorithms need clean edges to process properly.
Step 4: Post-Process Like a Pro (The Make-or-Break Phase)
Raw photos never go straight to Amazon. Ever. Professional post-processing changes good shots into images that convert.
But here’s where sellers screw up: they over-edit. Your product needs to look exactly like what arrives at the customer’s door. Misleading images generate returns and negative reviews.
Essential Editing Steps
Every product photo needs these adjustments:
- Background removal: Pure white (RGB 255, 255, 255), no exceptions
- Color correction: Match actual product color precisely
- Exposure adjustment: Bright without blowing out highlights
- Sharpening: Enhance details without creating halos
- Spot removal: Eliminate dust, fingerprints, minor blemishes
- Cropping/resizing: Final 2500 x 2500 pixel output
Software options that get the job done:
- Adobe Photoshop: Industry standard, $20/month
- Adobe Lightroom: Batch processing powerhouse
- Capture One: Professional alternative to Adobe
- GIMP: Free option that works in a pinch
- Canva: Quick edits and graphics overlays
Learn one software deeply rather than jumping between multiple options. Consistency speeds up your workflow.
Background Removal That Passes Amazon’s Bots
Amazon’s image recognition system checks background purity. Get this wrong and your listing gets flagged.
Professional background removal process:
- Open image in Photoshop
- Use Quick Selection tool to select product
- Refine edge with Select and Mask
- Create layer mask (non-destructive editing)
- Add pure white background layer underneath
- Check edges at 200% zoom for stray pixels
- Export as JPEG with white matte
The secret is in edge refinement. Harsh cutouts look amateur. Professional edges have subtle transitions that look natural on white.
Pro tip: Shoot on light gray instead of pure white. It’s easier to cut out in post while maintaining edge quality.
Color Accuracy That Prevents Returns
Color accuracy directly impacts return rates. When your product photos don’t match reality, customers feel deceived.
I tracked return reasons for a supplement brand over six months. 23% cited “color not as shown.” That’s $47,000 in unnecessary returns because their photos had oversaturated reds.
Color correction workflow:
- Shoot with color checker card in first frame
- Create custom color profile in Lightroom
- Apply profile to all shots from session
- Fine-tune individual colors if needed
- Compare to physical product under daylight
Never trust your monitor without calibration. A $150 monitor calibrator pays for itself by preventing color-related returns.
Step 5: Optimize for Amazon’s A10 Algorithm (The Secret Sauce)
Pretty pictures don’t guarantee sales. Your images need to work with Amazon’s A10 algorithm, not against it.
The algorithm analyzes your images for relevance signals. Get these wrong and your organic ranking suffers, regardless of image quality.
File Naming for Discoverability
Your image file names matter. Amazon’s system reads them for context about your product.
Proper file naming structure:
- Main image: ASIN_MAIN_brand-product-name.jpg
- Secondary images: ASIN_PT01_feature-description.jpg
- Use hyphens, not underscores between words
- Include primary keyword naturally
- Keep under 50 characters total
Example for a stainless steel water bottle:
- B08XYZ123_MAIN_acme-stainless-steel-water-bottle.jpg
- B08XYZ123_PT01_vacuum-insulated-keeps-cold-24hrs.jpg
- B08XYZ123_PT02_size-comparison-chart.jpg
This isn’t about gaming the system. It’s about helping Amazon understand your product better.
Image Metadata That Matters
Most sellers ignore image metadata. Big mistake. Research shows that proper image metadata improves discoverability across all platforms, including Amazon.
Essential metadata to include:
- Title: Product name with key features
- Description: Brief product description with benefits
- Keywords: Primary and secondary search terms
- Copyright: Your brand name and year
Use Adobe Bridge or similar tools to batch-add metadata before uploading. It takes five minutes and improves your listing’s overall optimization.
Mobile Optimization Is Non-Negotiable
Over 70% of Amazon shoppers browse on mobile. Your images need to work at thumbnail size or you’re dead in the water.
Mobile optimization checklist:
- Test all images at 150×150 pixel size
- Ensure product fills frame completely
- High contrast between product and background
- Key features visible without zoom
- Text overlays readable at small sizes
The biggest mistake? Using desktop-optimized images on mobile. That lifestyle shot looks great on a 27″ monitor. On an iPhone, it’s a meaningless blur.
Step 6: Test and Iterate Based on Data (Not Opinions)
Your images are live. Sales are coming in. Job done, right? Wrong.
The sellers crushing it treat product photography as an ongoing optimization process, not a one-time task.
Split Testing That Actually Works
Amazon’s Manage Your Experiments tool lets you A/B test main images. Use it or lose to competitors who do.
Elements worth testing:
- Angle: Front view vs. 3/4 angle vs. lifestyle
- Background: Pure white vs. light gradient
- Props: Product alone vs. with size reference
- Packaging: With or without box/packaging
- Zoom level: Full frame vs. slight breathing room
Run tests for minimum two weeks with at least 1,000 impressions per variant. Anything less gives false positives.
I tested main image angles for a kitchen gadget brand. The 3/4 angle shot increased CTR by 27% over the straight-on view. That’s an extra $8,000/month in revenue from one simple change.
Conversion Tracking Beyond CTR
Click-through rate tells half the story. Track these metrics for complete picture:
- Session percentage: How many clicks lead to product page views
- Conversion rate: Views to purchases
- Return rate: Are images setting accurate expectations?
- Review mentions: Do customers comment on image accuracy?
Connect your image updates to business metrics. If new lifestyle images increase CTR but tank conversion rate, you’ve got a problem.
Competitor Analysis for Continuous Improvement
Your competitors’ images reveal what’s working in your category. Ignore them at your peril.
Monthly competitor audit process:
- Screenshot top 10 competitors’ full image sets
- Note common patterns in high-BSR listings
- Identify gaps in their visual storytelling
- Test their successful elements in your context
- Track changes over time
Don’t copy blindly. Understand why certain images work, then adapt those principles to your brand.
Common Mistakes to Avoid

After analyzing hundreds of failed Amazon listings, these photography mistakes kill conversions most often:
- Using supplier images: Generic photos used by 50 other sellers tank your differentiation
- Inconsistent lighting: Mixed color temperatures make your brand look amateur
- Over-editing products: Unrealistic enhancement increases return rates
- Ignoring scale: Customers can’t judge size without reference objects
- Skipping lifestyle shots: Features tell, lifestyle images sell
- Poor image sequence: Random order instead of logical flow loses buyers
Fix these issues and you’re already ahead of 80% of sellers.
What’s Next
You’ve learned how to take product photos for Amazon listings that actually convert. The question is: will you execute or keep procrastinating?
Start with your best-selling product. Reshoot the entire image set using these techniques. Track the results for 30 days. When you see conversion rates jump, expand to your entire catalog.
Professional product photography isn’t about artistic vision. It’s about understanding buyer psychology and Amazon’s algorithm. Master both and watch your sales graphs go vertical.
Stop making excuses. Your competitors aren’t waiting. Every day you delay is money left on the table.
Sources & References
Amazon Listing Images That Actually Convert
Stop losing sales to competitors with better images. We research your niche, find the 6 buying objections in your category, and ship 7 strategic listing images that address each one.
Related Reading
Related Reading
Related Reading
Related Reading
Related Reading
Frequently Asked Questions
What camera settings should I use for Amazon product photography?
Use manual mode with aperture f/8-f/11, shutter speed 1/125 or faster, and ISO 100-400. These settings ensure maximum sharpness with minimal noise. Always shoot in RAW format for editing flexibility.
How much should I budget for a complete product photography setup?
A basic but professional setup runs $1,500-2,000 including camera, lens, lights, and accessories. You can start with less using smartphones and DIY lighting, but expect to spend 3x more time getting acceptable results.
What’s the most important image slot after the main image?
Slot 2 should be a lifestyle image showing your product in use. This image has the highest view rate after the main image and directly impacts conversion rate. Make it count.
How do I ensure my white background passes Amazon’s requirements?
Your background must be pure white (RGB 255, 255, 255). Use the eyedropper tool in Photoshop to verify. Even RGB 254, 254, 254 can trigger Amazon’s image bots and get your listing flagged.
Should I include text overlays on my Amazon product images?
Yes, but only on secondary images (slots 2-7). Text overlays highlighting key features and benefits can increase conversion rates by 20-30%. Keep text large enough to read on mobile devices.
Leave a Reply